Using barcodes in Apple Numbers for Mac

Unlike other spreadsheets, Apple’s Numbers is not only a number crunching powerhouse, but also comes with layout features that allow users to turn boring number lists into lovely designed reports.
Unique about Apple Numbers is that its sheets are canvases containing data tables and free space where you can put anything from text boxes to images and vector art. Numbers supports different ways of handling images and vector art, depending on whether you place them in a table or outside the table.
When you drag an image or vector art like a barcode to the free space on the canvas, you can resize the art to its original size. However, if you drop a barcode inside a table, it will be treated as a background image and resized with the table cell.
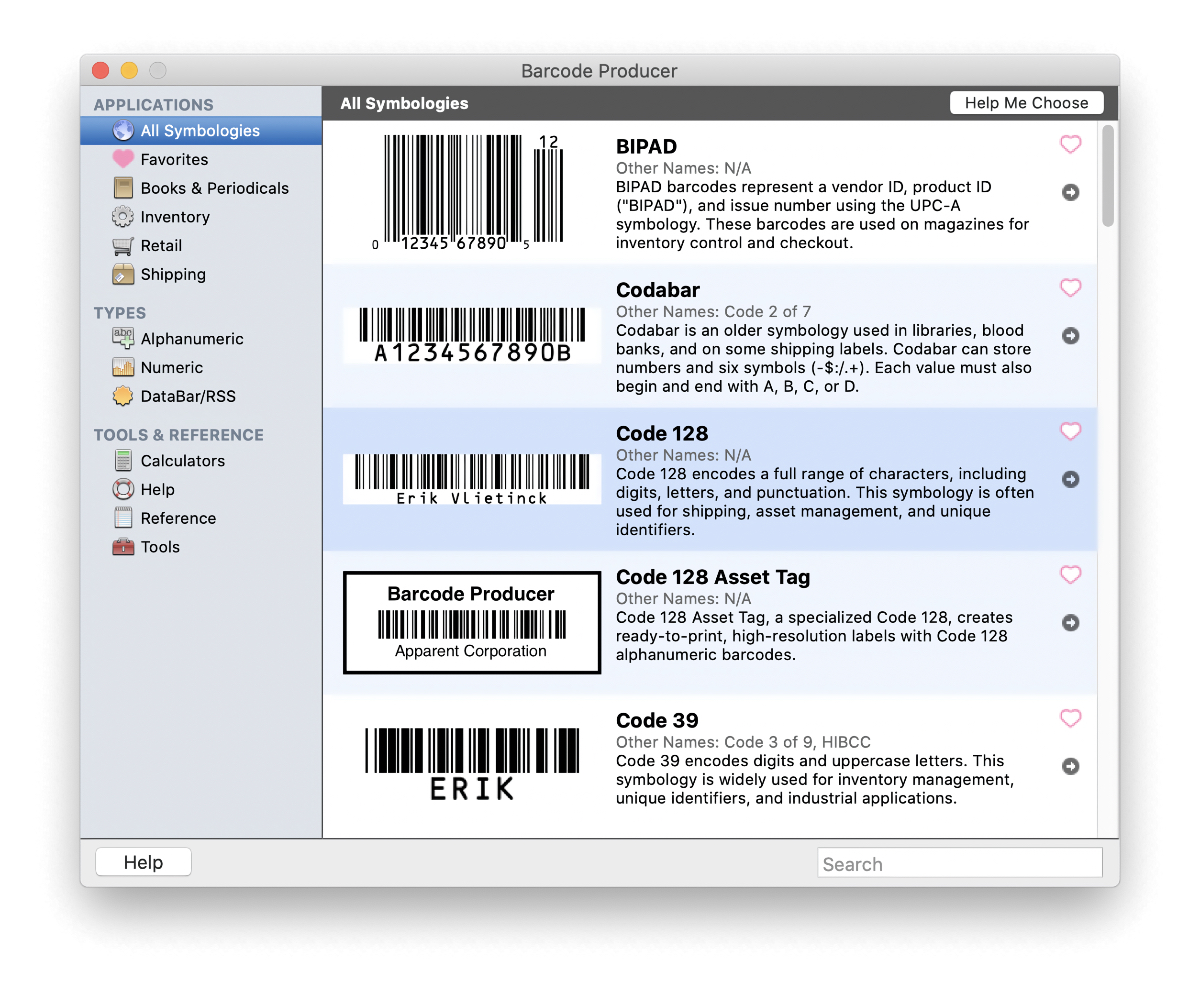
Despite its many capabilities, users of Apple Numbers cannot create barcodes from within the app. For that, you need a barcode generator app like Barcode Producer, which creates barcodes that comply with the industry standards for each different symbology. It offers design capabilities that fit the requirements so that barcodes can be read with a barcode scanner such as the IntelliScanner Pro as well as with area imagers and portable data collectors.
Barcode Producer fits in well with the user-friendly workflow of Apple Numbers. This step-by-step guide shows you how to create and use barcodes with Apple Numbers.
Placing a single barcode outside of a Numbers table
Step 1
Select your barcode symbology — EAN-13, ISBN, QR Code… — from Barcode Producer’s main window. When you’re done creating your barcode, make a note of the barcode’s size in the Preview window.
Step 2
Enter your barcode data. Click the Save button. You should set Barcode Producer to create a barcode in TIFF format. Apple Numbers cannot print EPS or PDF barcodes correctly as the black bars run over into each other in those file formats.
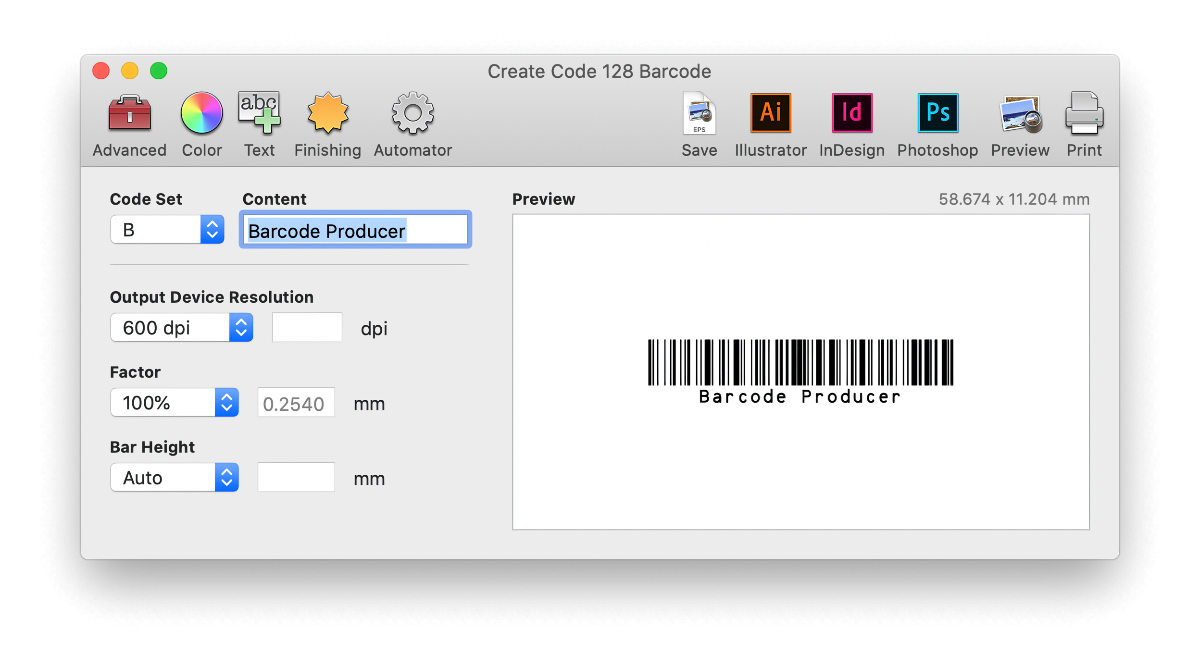
Leave the resolution at the default value or consult with your commercial printer. Select one of the presets from the dropdown menu or select the Custom option and enter the resolution in the entry field.
Step 3
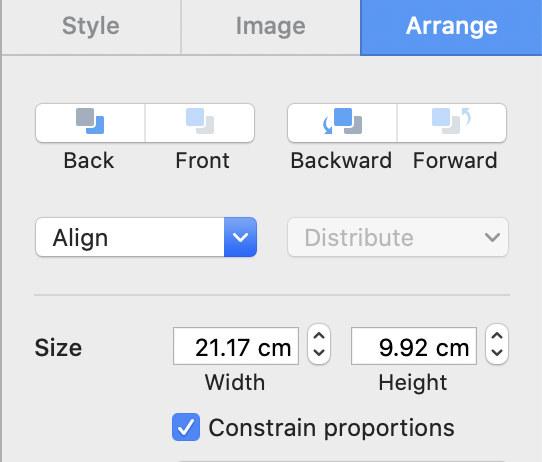
Open your Numbers spreadsheet document and select the sheet where you want the barcode to appear. Drag and drop the barcode file to an empty space on the page. When you select the barcode, you will see the Inspector change from the Table - Cell - Text - Arrange tabs to the Style - Image - Arrange tabs. These tabs allow you to manipulate the barcode art in various ways.

First resize the barcode to the size you made a note of in Step 1. Make sure your Ruler units are set to cm in Numbers’ Preferences panel. Do not uncheck “Constrain Proportions”.
You can rotate the barcode as it is rotated in full, but it will depend on your printer’s capabilities whether the rotation will cause ‘jaggies’ that are perhaps not even visible by the naked eye. Jagged edges may make the barcode less easy to scan.
Do not use any of the other features that are listed under the Style or Arrange tabs, nor any image adjustments, enhancements, nor masks or Instant Alpha that are listed under the Image tab on your barcode. Using any of these could decrease its readability.
Step 4
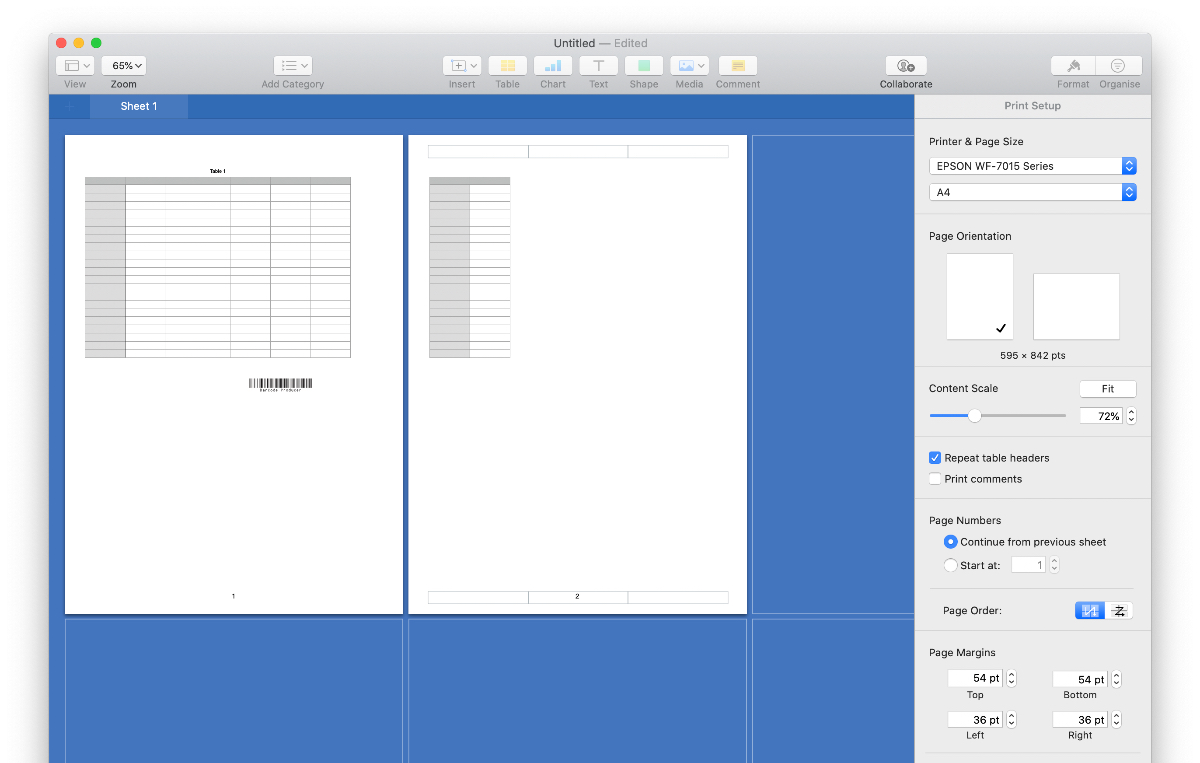
Preview your document in Print Setup mode to verify that your barcode is located inside the page margins.
Multiple barcodes workflow
Step 1
If you’re going to print multiple labels at once, your output (DPI, Factor and Bar Height) for printing from Numbers is best left at the default settings. Make a note of the barcode’s size in the Preview window. Click the Automator icon.
Step 2
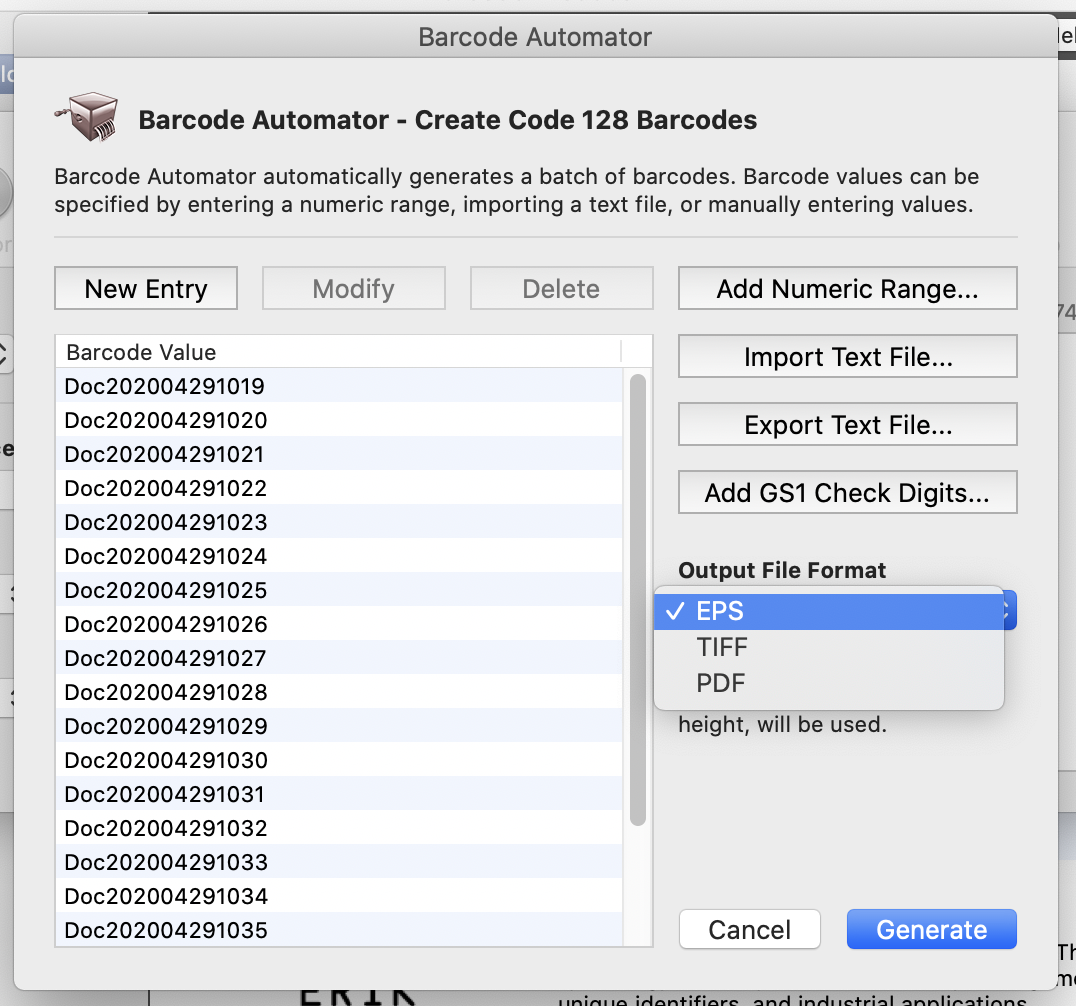
You can manually enter barcode numbers by clicking the New Entry button and filling in the number in the Barcode Value panel. However, you can also batch-enter numbers in Automator by clicking the Add Numeric Range button. In the From field type your start value and in the End field your end value, and in the Step field the interval. Then check the Add Prefix/Suffix checkbox if you want to add the same prefix/suffix to all labels. Click OK.
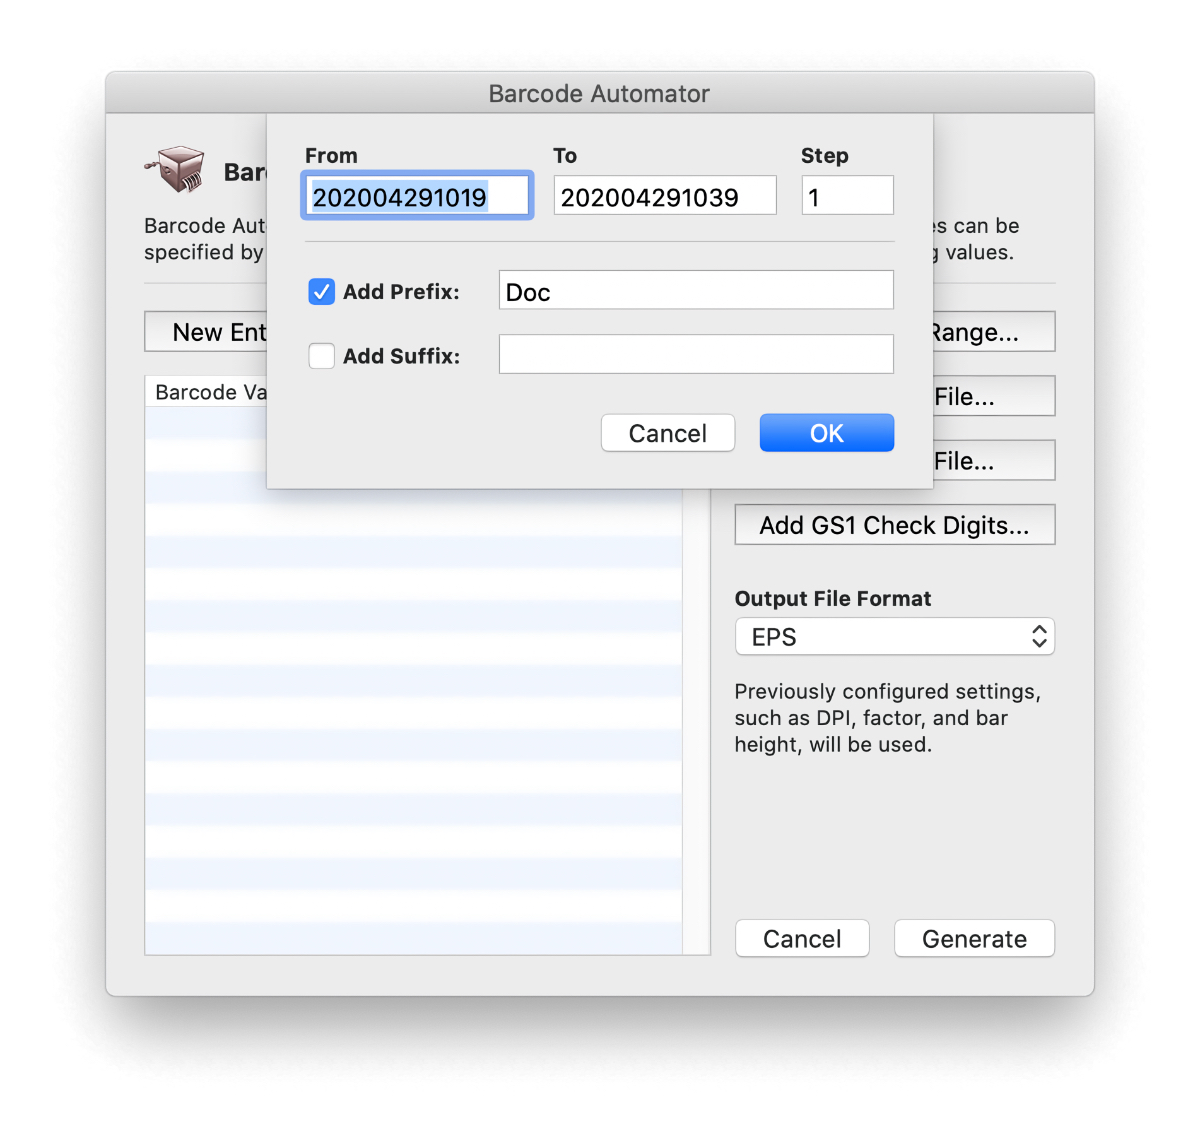
You can also import a text file containing one number/code per line and Automator will automatically load the barcode data in the Barcode Value panel.
Step 3
If you want to add a GS1 check digit to every barcode in the list (where it is relevant and available), click the Add GS1 Check Digits.. button and confirm your choice.

Step 4
From the Output File Format dropdown menu, select TIFF as your output format.
Step 5
Click the Generate button and select a destination folder from the window. Your barcodes will be created in the folder you selected. You should set Barcode Producer to create a barcode in TIFF format only. Apple Numbers cannot print EPS or PDF barcodes correctly as the black bars run over into each other in those file formats.
Step 6
Open your Numbers spreadsheet document and select the sheet where you want the barcodes to appear. Either drop the barcodes in an empty space on the sheet or click on the Media button in the Toolbar, select Choose… from the options and select your barcode image from the dialog window.
In order to get the barcode to print in the size Barcode Producer generated, which is its optimum, you will need to resize it referring to the note you made in Step 1. Make sure your Ruler units are set to cm in Numbers’ Preferences panel and resize without changing the proportions.
Also, preview your document in Print Setup mode to verify that your barcode is located inside the page margins.
Workaround for adding barcodes to table cells
Apple Numbers does not support adding images to table cells, except as background image or directly from a camera or scanner.
Inserting barcodes as background image implies the barcode will resize with the cell size or is rendered in ways that are unusable for barcode scanning.
There is, however, a workaround. The only way to render the barcode correctly when used as a background image in a cell is by setting the column width to the value you made a note of in Step 1 and then dragging the cell height until a margin appears above and below the image.
You can apply this workaround to a single barcode but also to multiple barcodes with each dropped in its own cell. Whatever you choose, the steps for each workflow above applies, except with regards to the image resizing.