How to make perfect barcodes for Avery label sheets using Microsoft Word

Microsoft develops the industry-standard word processor, and Avery manufactures industry-standard labels and label sheets. Both are intended for use at home, in the office, and in industrial environments. Avery Barcode Labels are generally created to contain barcodes only.
Microsoft Word is great for text, but it has limited layout capabilities, and it doesn’t have a built-in barcode generator. While Microsoft Word does offer barcode fonts, they can have issues and drawbacks, which is why industry-leading barcode creation apps (like Barcode Producer!) don’t work with them. Here are some other reasons why we don’t recommend using Microsoft’s barcode fonts:
- They have limited use. For example, 2D barcode fonts don’t exist.
- Microsoft Word may automatically adjust the character spacing and make the barcode unreadable and unusable.
- For each barcode type, you need a different font. These can be expensive and time-consuming to find and use.
- Most barcodes require a specially-calculated check digit.The addition of a check digit is necesesary, otherwise your barcode won’t be recognized by barcode scanners, such as the IntelliScanner Pro, area imagers, or portable data collectors. Microsoft Word doesn’t offer a check digit feature, but a dedicated barcode generation software like Barcode Producer does this work for you!
The best way to create a barcode you can trust will work is to use an industry-standard barcode generator like Barcode Producer, which creates barcodes as high-resolution images or vector art.
Barcode Producer has a built-in Automator module, which makes it very easy and fast to batch-create unique barcodes that fully comply with industry standards without any need for barcode fonts on your computer.
It is very easy to populate an Avery label sheet template in Microsoft Word with a folder full of barcodes produced by Barcode Producer’s Automator.
To make Avery barcode labels in Word, you’ll need to:
- Select or download the Avery label sheet that corresponds with the one you purchased
- Create the barcodes and transfer them to the sheet in Word
- Print the label sheet.
See below for a more detailed step-by-step description.
How to create an Avery label from Word’s template collection
For this tutorial, we assume you are viewing your Word document in Print Layout.
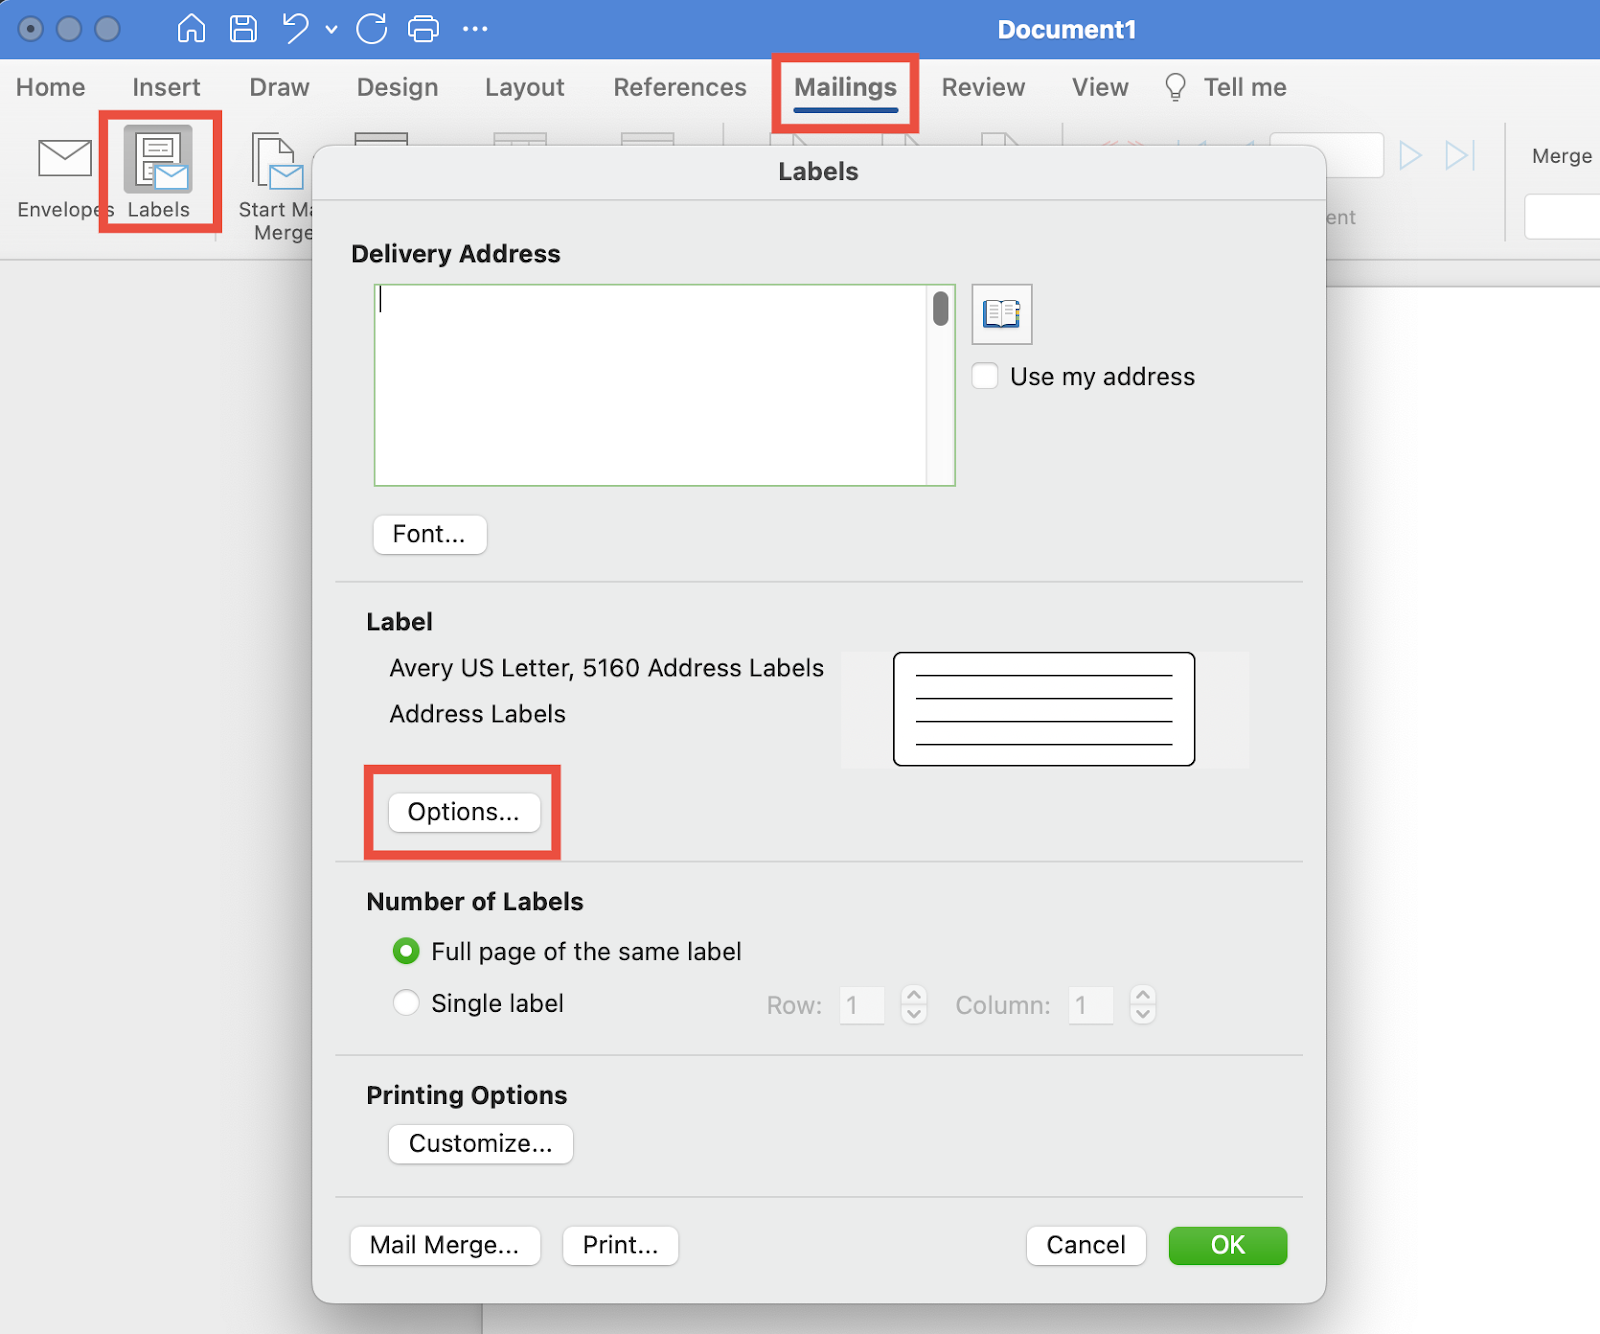
Step 1
With your Word document open, go to the top of the screen and click Mailings > Labels > Options. In older versions of Word, you’ll find the Options setting in Tools at the top of the page.
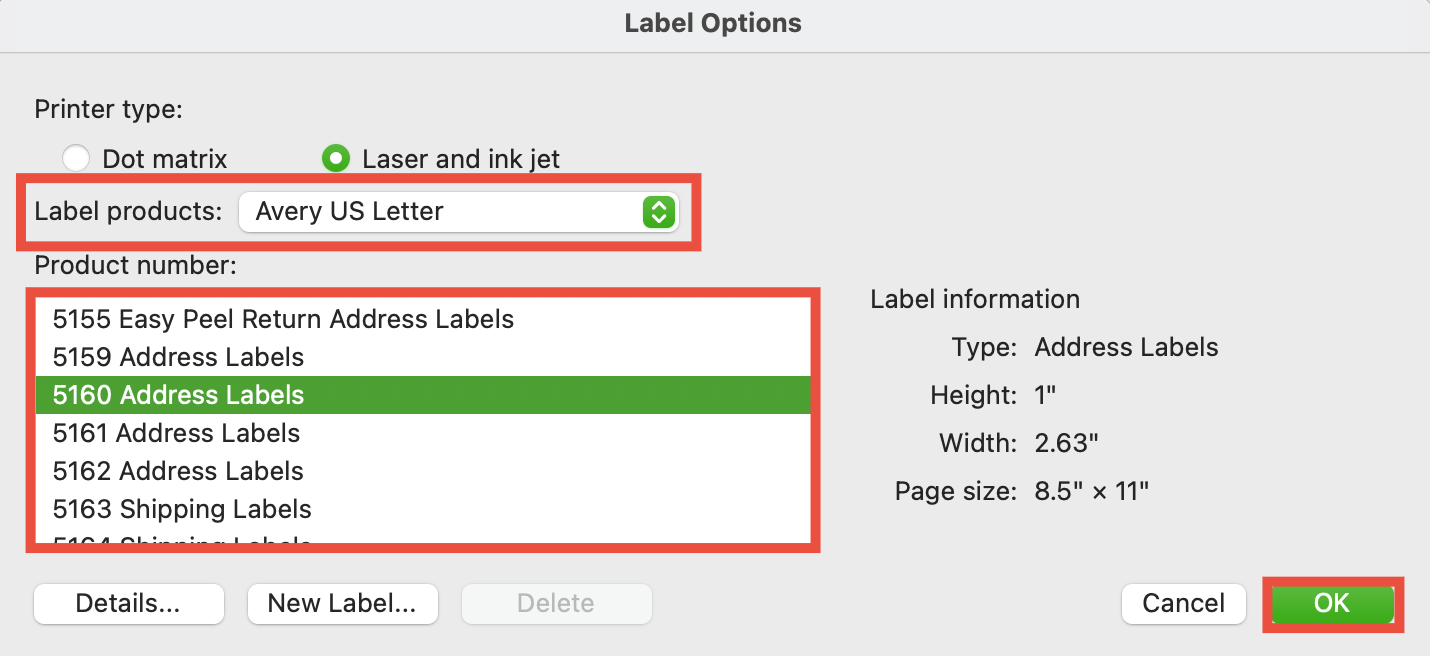
Step 2
Select Avery from the drop-down menu next to Label products and select your Avery product number, then click OK, and OK again.
Step 3
You can now drag and drop barcodes from the folder you saved them into the labels on the sheet.

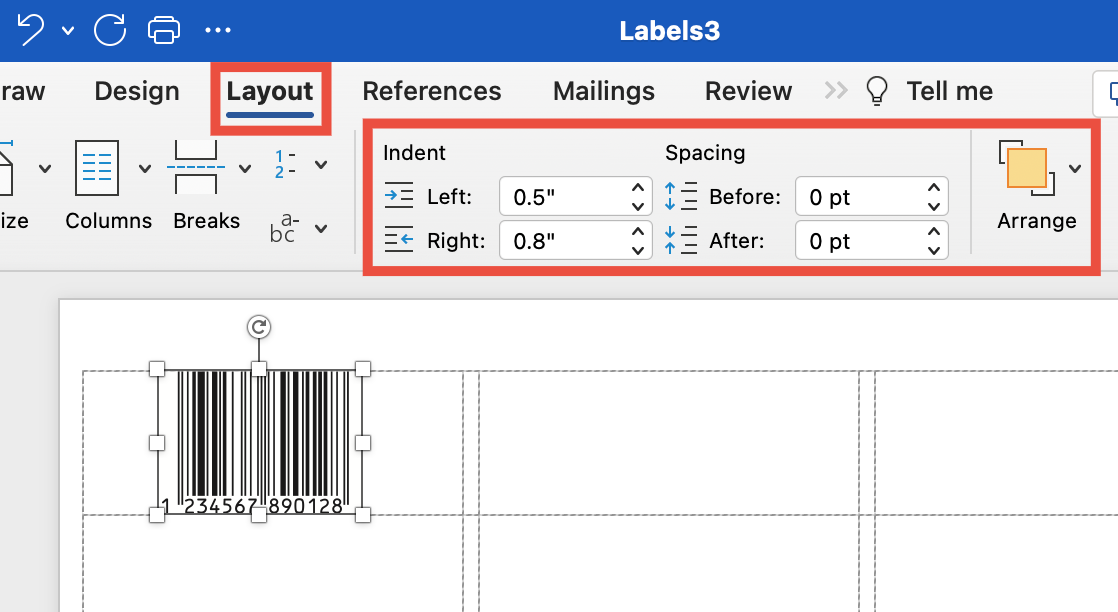
Step 4
If needed, adjust the indentation and paragraph spacing under Layout to make sure your barcodes are situated exactly where you’d like them.
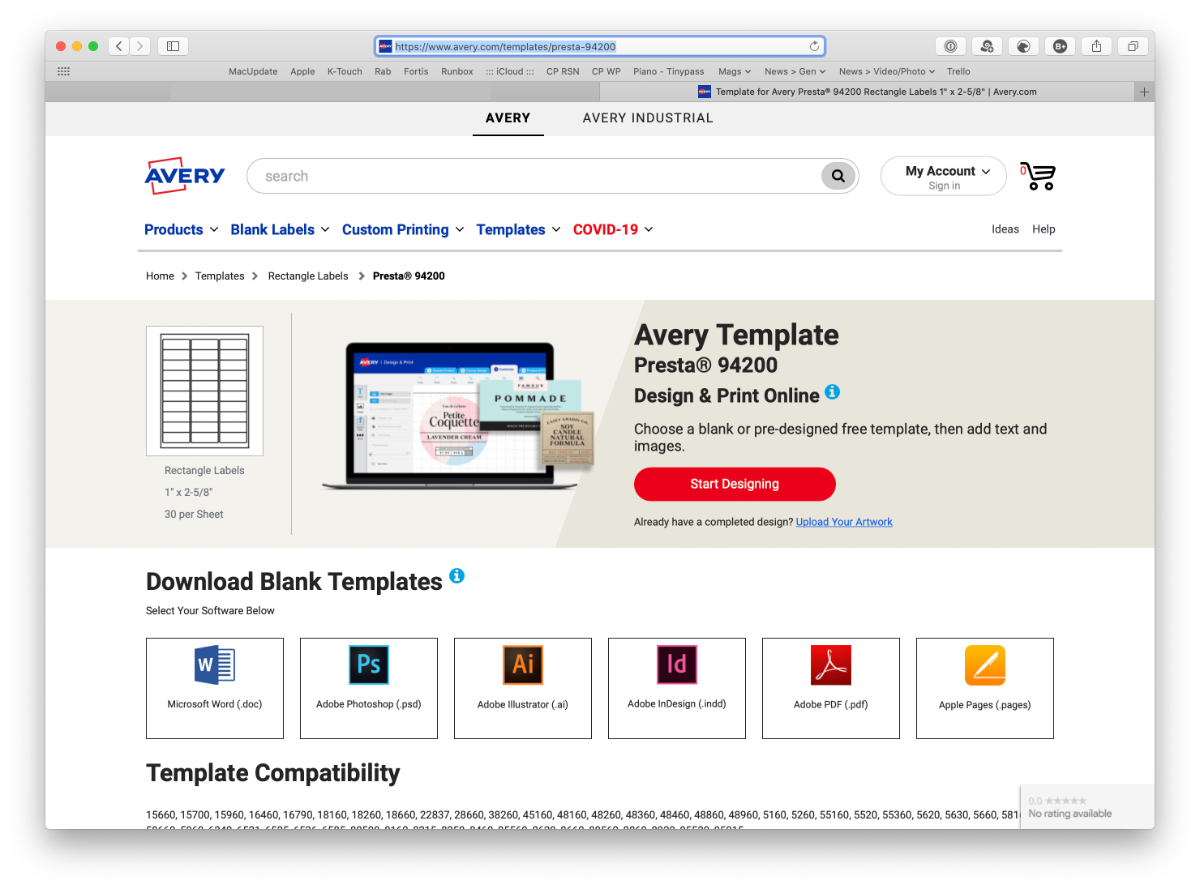
Loading an Avery label sheet that is not in Word’s template collection
If your product number isn't available in the list from Step 2, you’ll need to download the appropriate label sheet template from the Avery website.
Open it in Word and save it as a document.
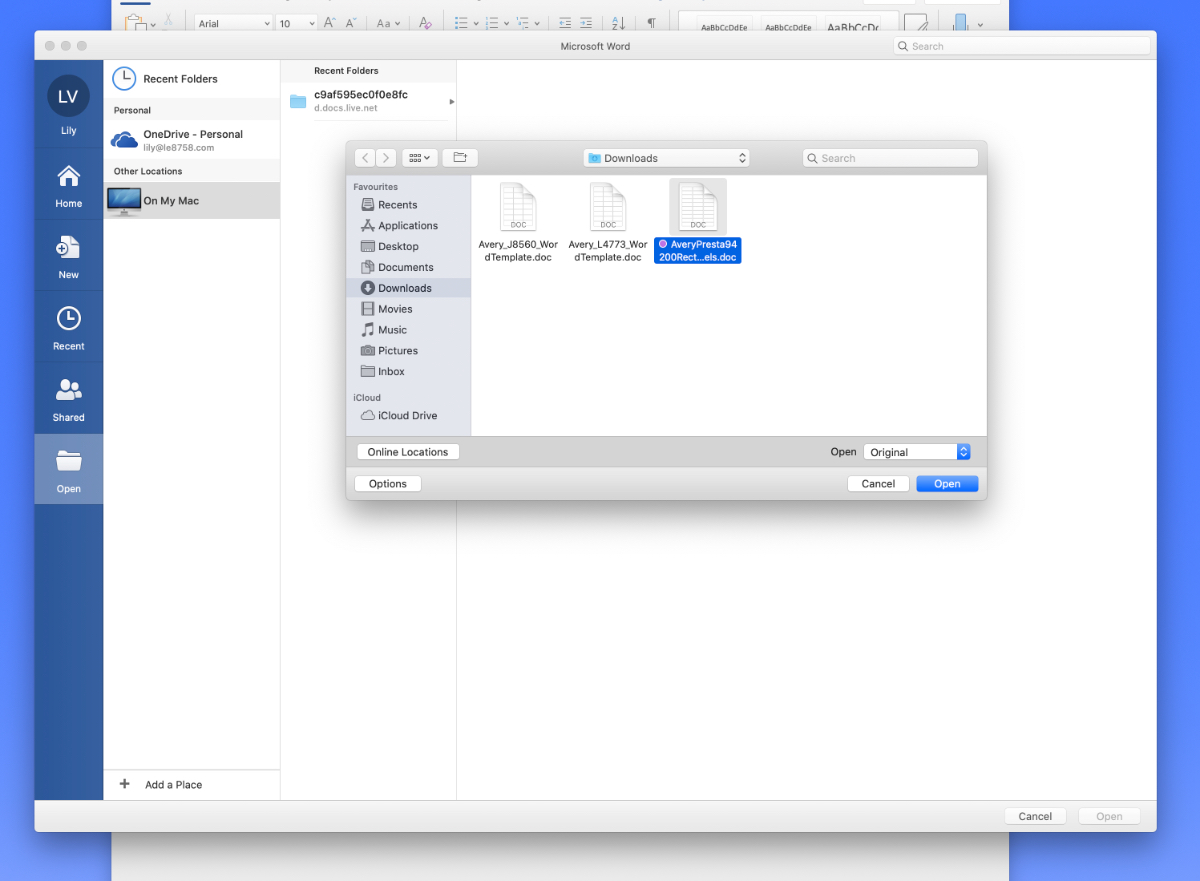
Open the template and save it as a doc.
The template downloaded from Avery is actually a table with rounded rectangles drawn on top of it. Before you can add barcodes to each label, you may need to click Layout > Selection Pane. You will see a whole list of "AutoShapes". Click Hide All, and the AutoShapes should disappear from view, revealing the table cells underneath.
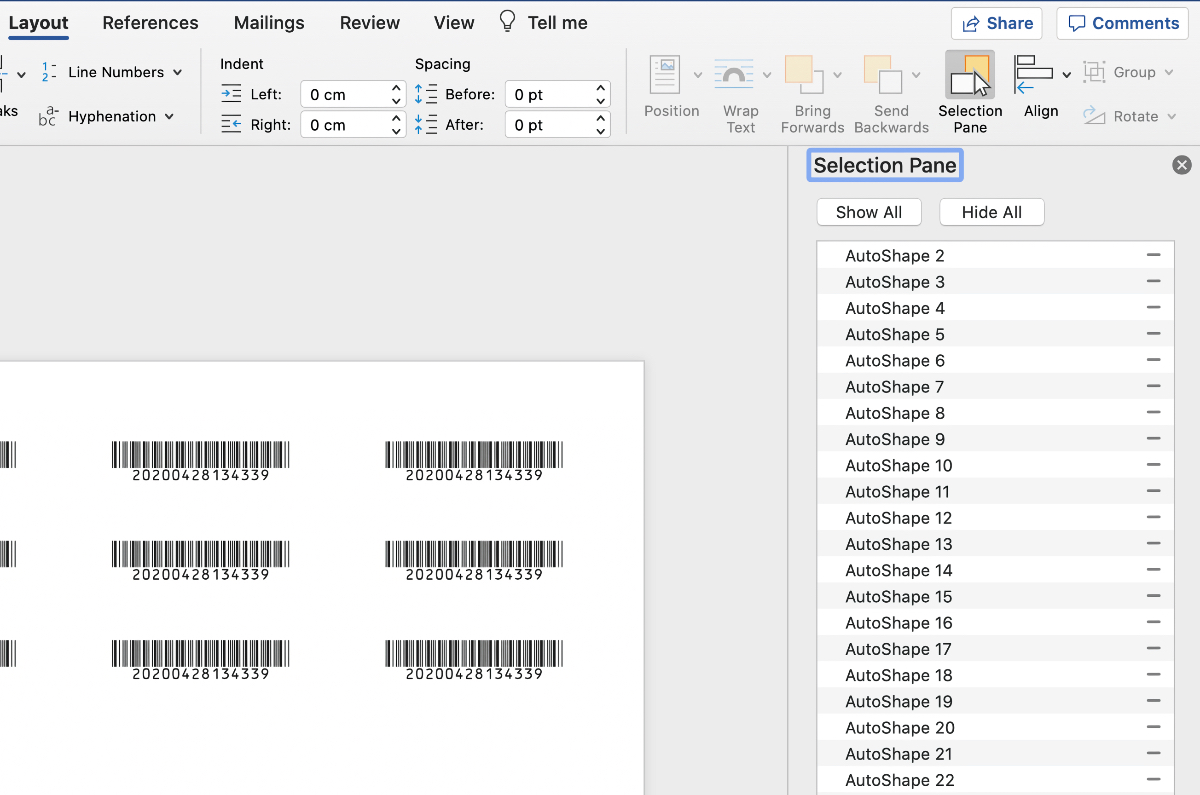
AutoShapes in the Selection Pane
Creating your barcode labels in Barcode Producer
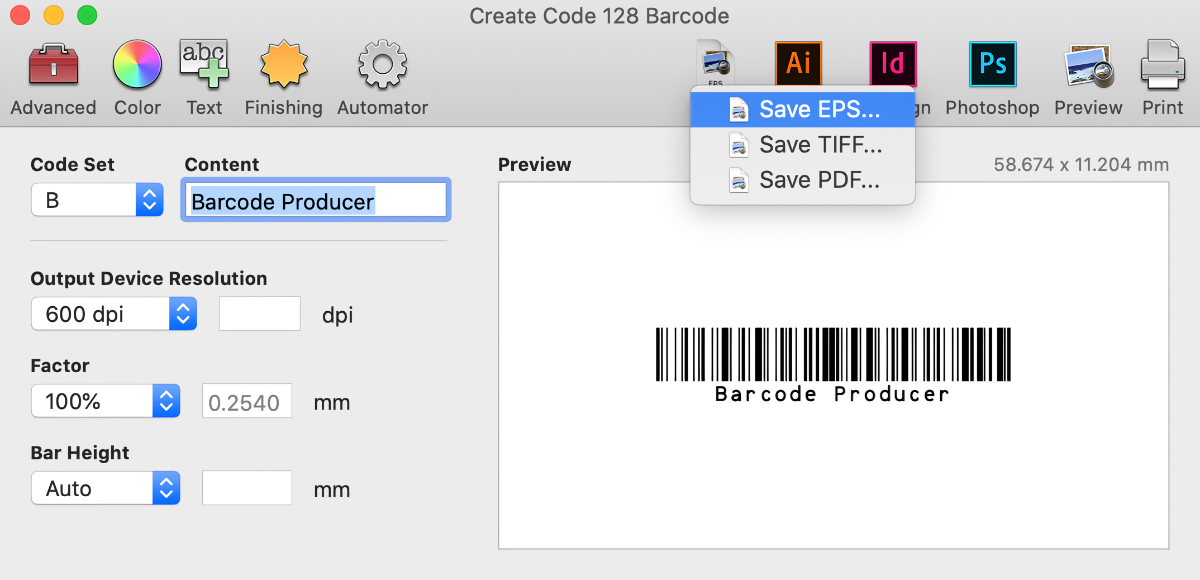
If you’re going to print only one label, enter the characters in the Content field. When finished, click the Save button and then select either EPS, PDF, or TIFF. EPS is the preferred output format for barcodes because it ensures the best results.
Multiple labels workflow
Step 1
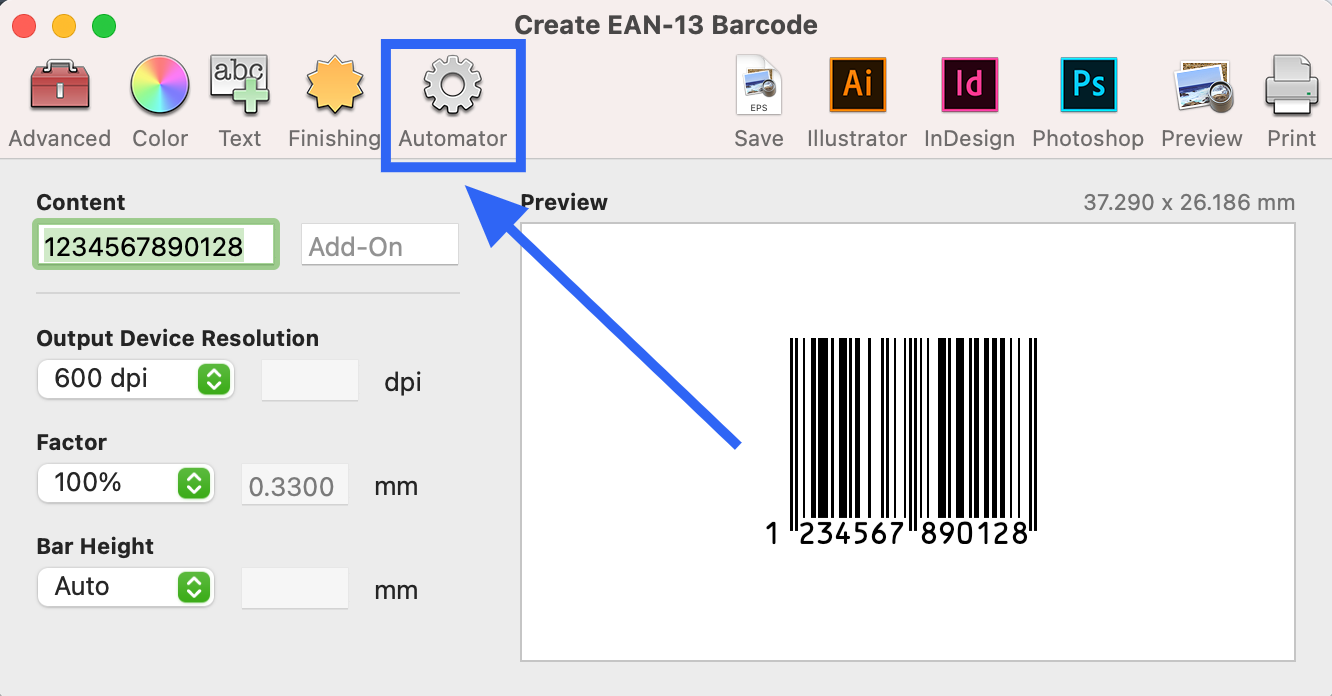
If you need to create multiple of the same type of barcode, you can do so with our Automator Plug-In. The Automator Plug-In allows you to create a large batch of batch of barcodes at once. If you’re going to print multiple labels at once, it’s best to leave the DPI, Factor, and Bar Height at the default settings.
To use the Automator Plug-In, first select the Automator gear icon from the Create barcode window.
Step 2
With the Automator Plug-In window open, you can add your barcode values by manually by clicking New Entry, by importing a text file that lists all of the values, or, if all of your values are in numerical order, you can specify a range of numbers and Barcode Producer will generate a list for you.
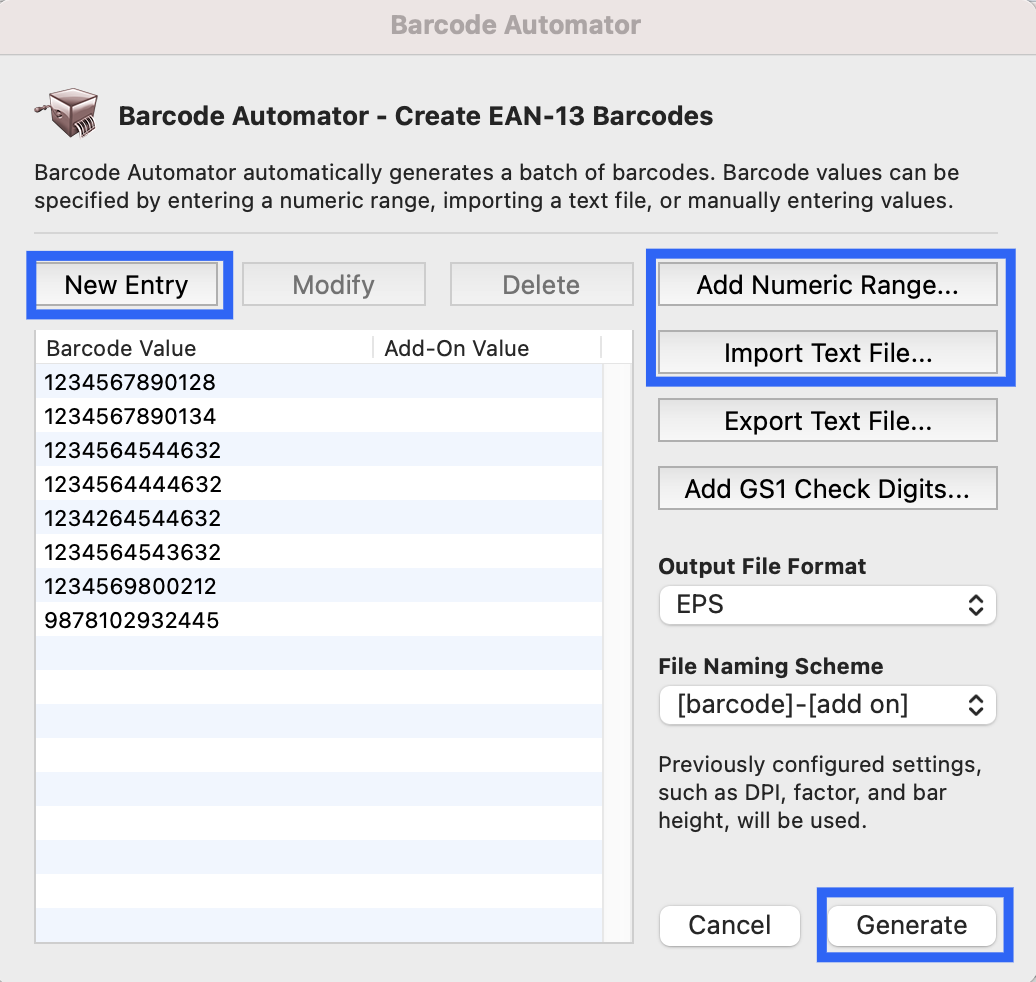
Step 3
Once you’ve confirmed your Output File Format and File Naming Scheme, click Generate to save all of your barcode files to your computer.
Transferring your barcodes to the label sheet
If you created only one barcode, you can directly drag and drop the image in an empty label cell on the Avery sheet template from the output folder. If the barcode isn’t centered in the label cell, you may need to adjust both indentation and paragraph spacing.
If you’ve created multiple barcodes, you will need to drag and drop each barcode image to an empty label cell on the Avery sheet template one by one. Again, adjustment to indentation and paragraph spacing may be necessary.
Printing your label sheet
Load the correct Avery label sheet to your printer. In Word, check to make sure your page is setup correctly (page size, etc.). Then click File > Print button and leave “Print PostScript over text” unchecked. Your barcodes will now print perfectly on your Avery label sheet.