Create your first barcode

Barcode Producer generates perfect barcodes. Download a free demo.
Creating your first barcode with Barcode Producer is a simple 3-step process. Barcode Producer can take care of almost everything, so you don’t need to worry about things like check digits, encoding mode, code page, and other specialized settings that require a deep understanding of how barcodes work.
Basic information about barcode symbologies is a good place to start. We’ve also written a glossary of the most common barcodes you can create with Barcode Producer.
Don't have the demo yet? Download it now.
Brief overview of barcode symbologies
Generally speaking, there are three types of barcode symbologies: linear or 1D, 2D, and composite barcodes. Linear symbologies are the ones you find in retail and other industries, and they are represented by the typical black bars with spaces in between. They encode information in one dimension, i.e., the relationship between the bar widths and spaces.
2D barcode symbologies like the MaxiCode, Data Matrix, and QR Code® encode the information in two dimensions. The information is not stored by using different bar/space widths but by the position of black or white dots.
Composite codes, like the GS1 DataBar Composite Symbology, combine linear with 2D symbologies. The linear code component encodes the most important information (like the item's primary identification). The 2D component is used for additional data (like expiration, batch number, etc.)
How do I make a barcode?
Creating a barcode with Barcode Producer is easy! The first and most important step is to download Barcode Producer and open it. Once you’re in the program, you simply select the symbology (i.e., the type of barcode) you want to make. For use in retail, the most often used symbologies are EAN-13 and UPC-A. For most other purposes, you can use Code 128. If this is your first barcode, let’s start with UPC-A. With the “Create UPC-A Barcode” window open, start typing numbers into the content field, and you'll see a live preview of your barcode to the right. You might notice that the last digit is set automatically – that's the check digit. All that’s left is to save your barcode as a file or send it to one of the apps on the toolbar.
Creating an EAN-13 barcode
Now let’s create an EAN-13 barcode. Again, the first step is to launch the app (download here if you don't already have Barcode Producer installed) and decide on a barcode to create.
Barcode standards are set by international organizations (such as ISO) and industry groups (such as GS1 or HIBCC). If you want your UPC or EAN codes to be unique and globally recognized, you should apply for a barcode at the GS1 website. GS1 is the only official provider of GS1 GTINs and EAN/UPC barcodes globally.
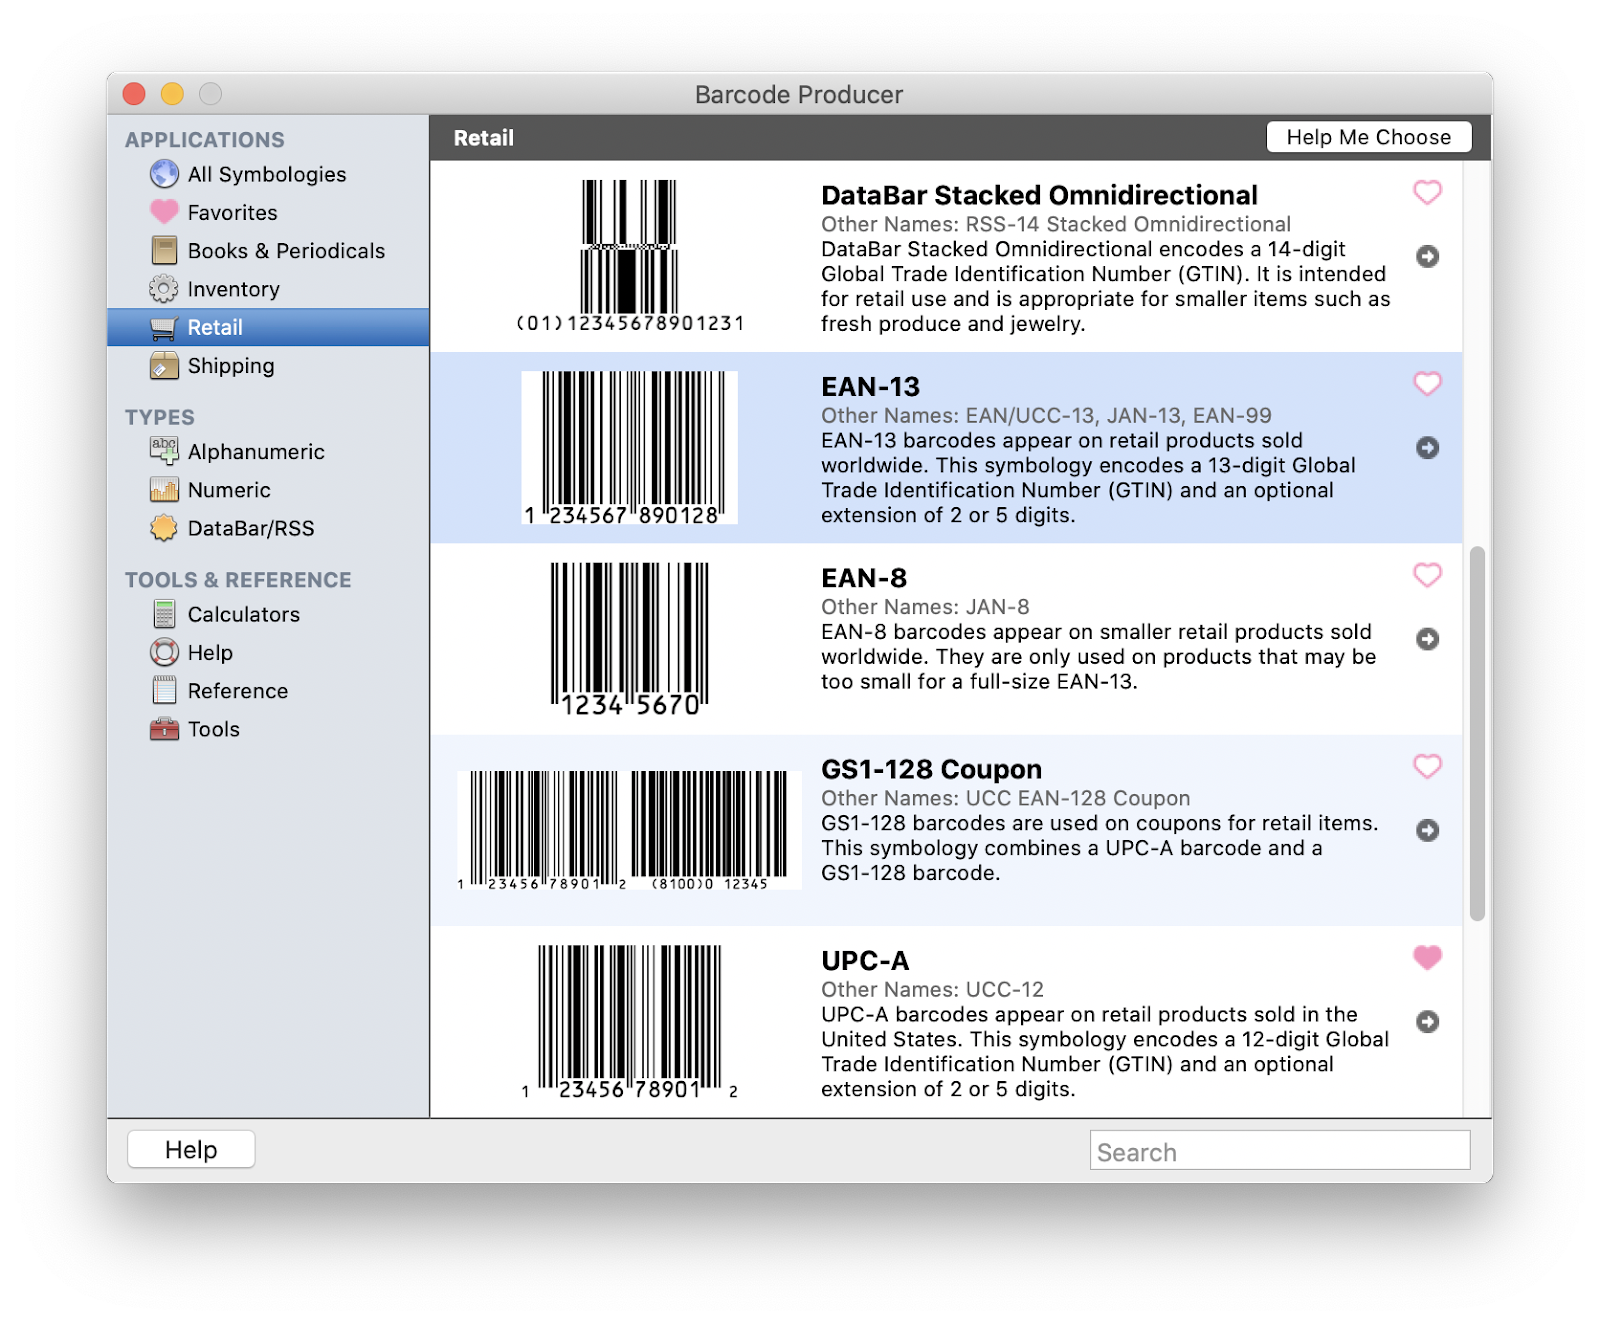
Select the EAN-13 symbology
In the Applications sidebar on the left, select Retail, then scroll down until you see EAN-13. Hovering over the symbologies turns them blue; to select one, you can click on the right arrow or anywhere in the blue area. The Create EAN-13 Barcode window will open.
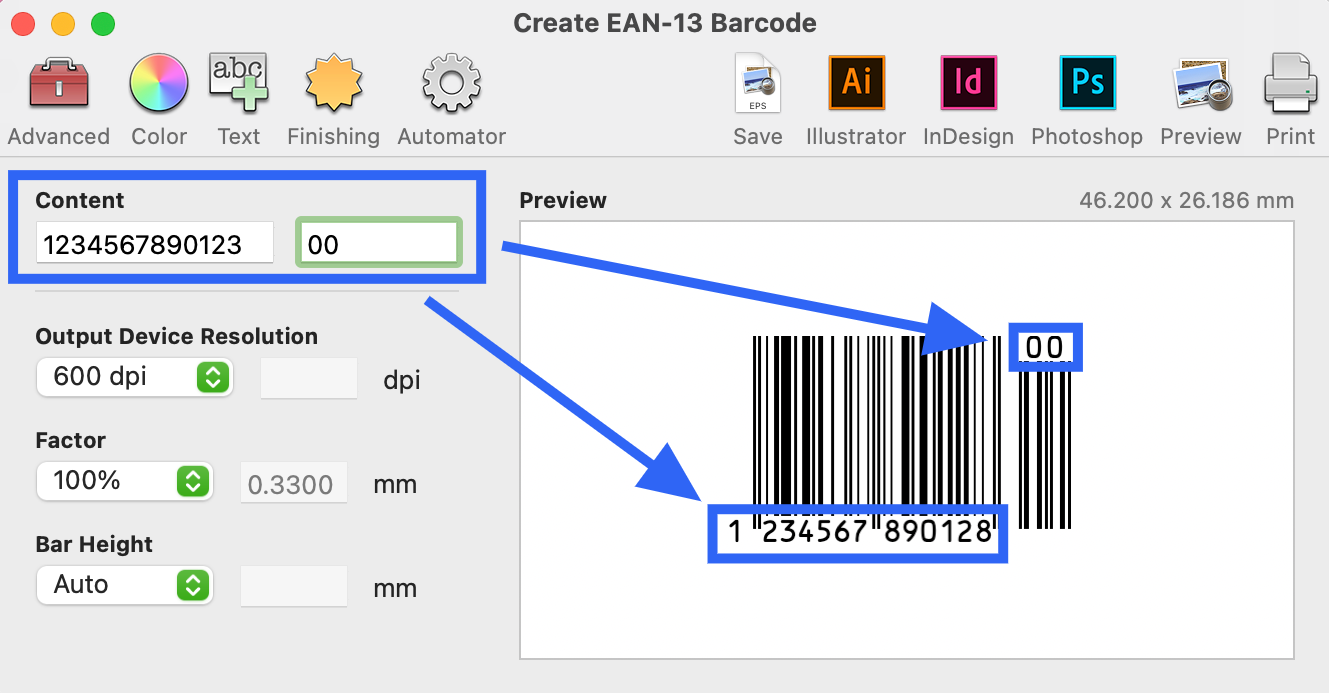
Step 1: Type a number in the Content field.
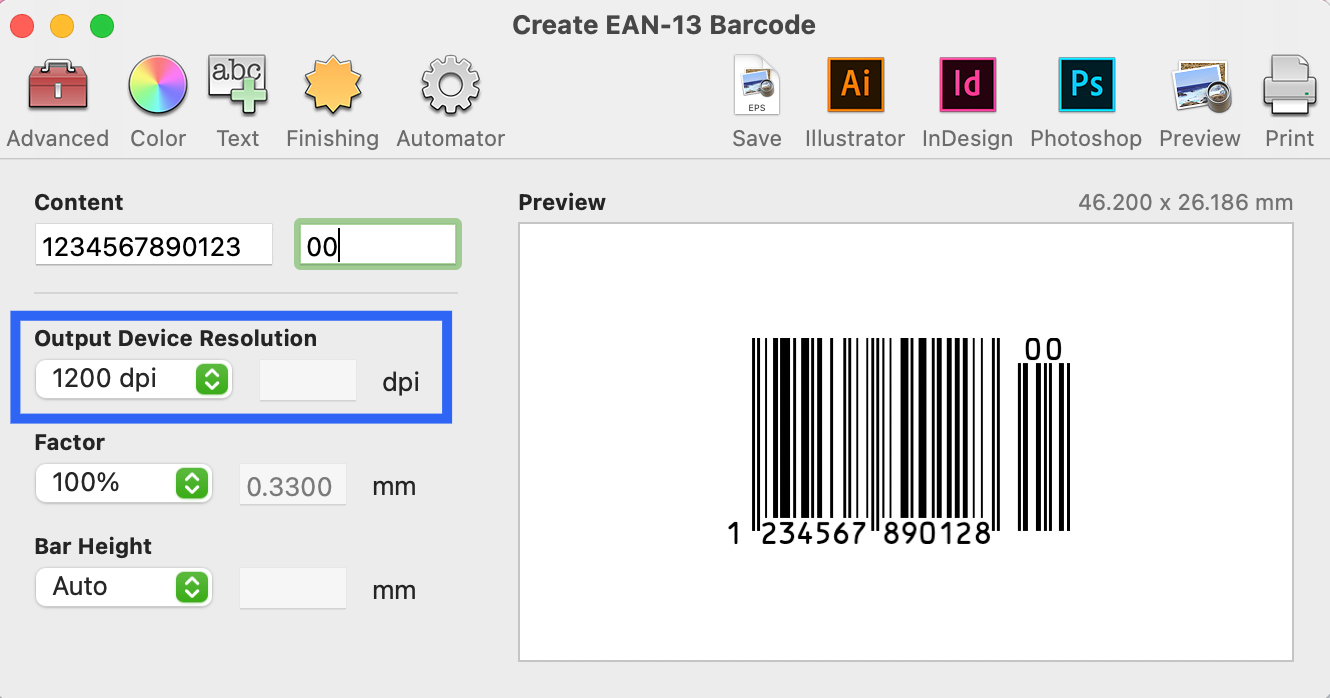
Step 2: Select the output resolution for your printer in the Output Device Resolution field.
Step 3 (optional): Set the size of the barcode in the Factor field.
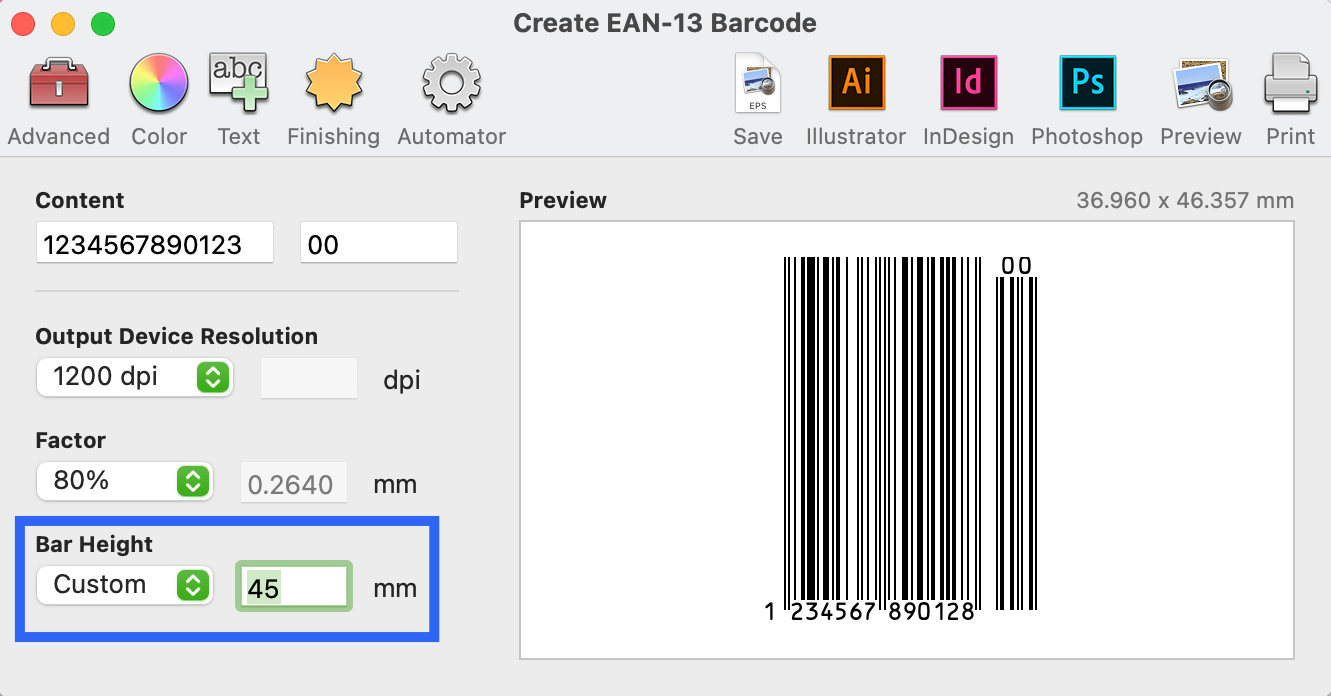
Step 4 (optional): Set the bar height in the Bar Height field.
Step 5: Click the Save button and select a format to save the barcode to your computer, click one of the app buttons to open up the barcode in your Adobe software, or save and open the barcode in Apple’s Preview.
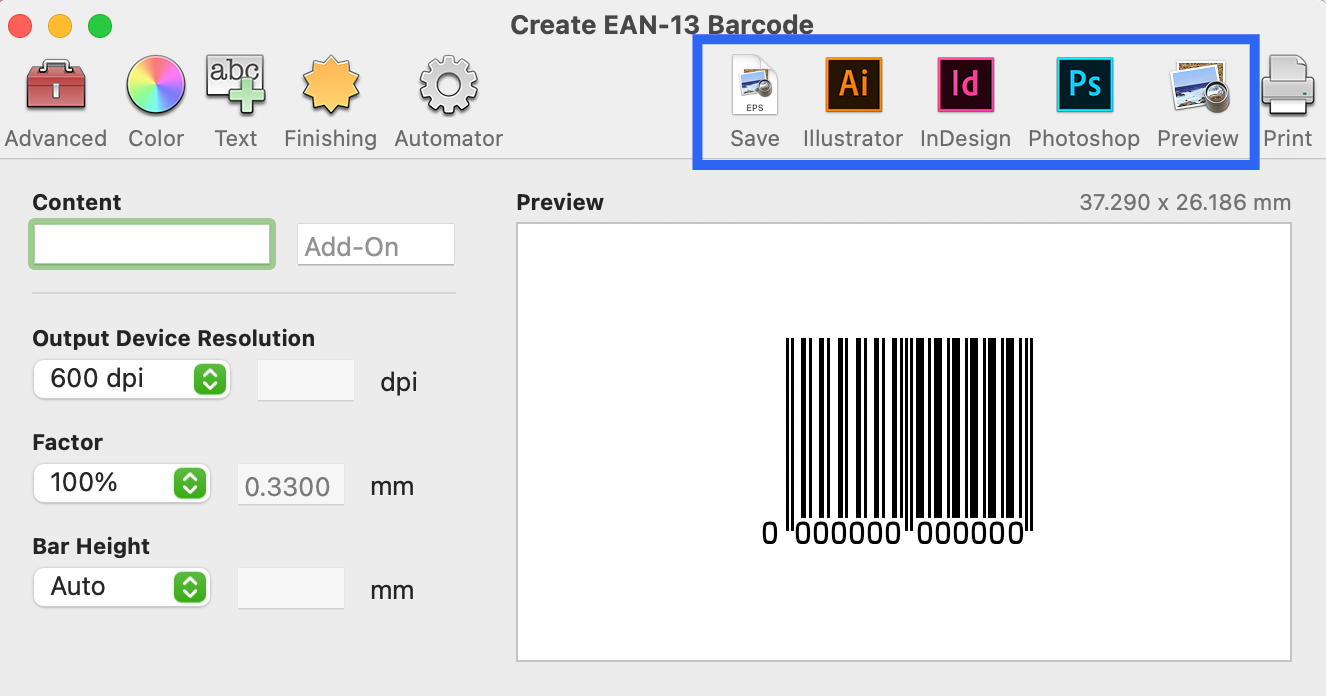
Now, let’s take a closer look at the various fields in the Create window:
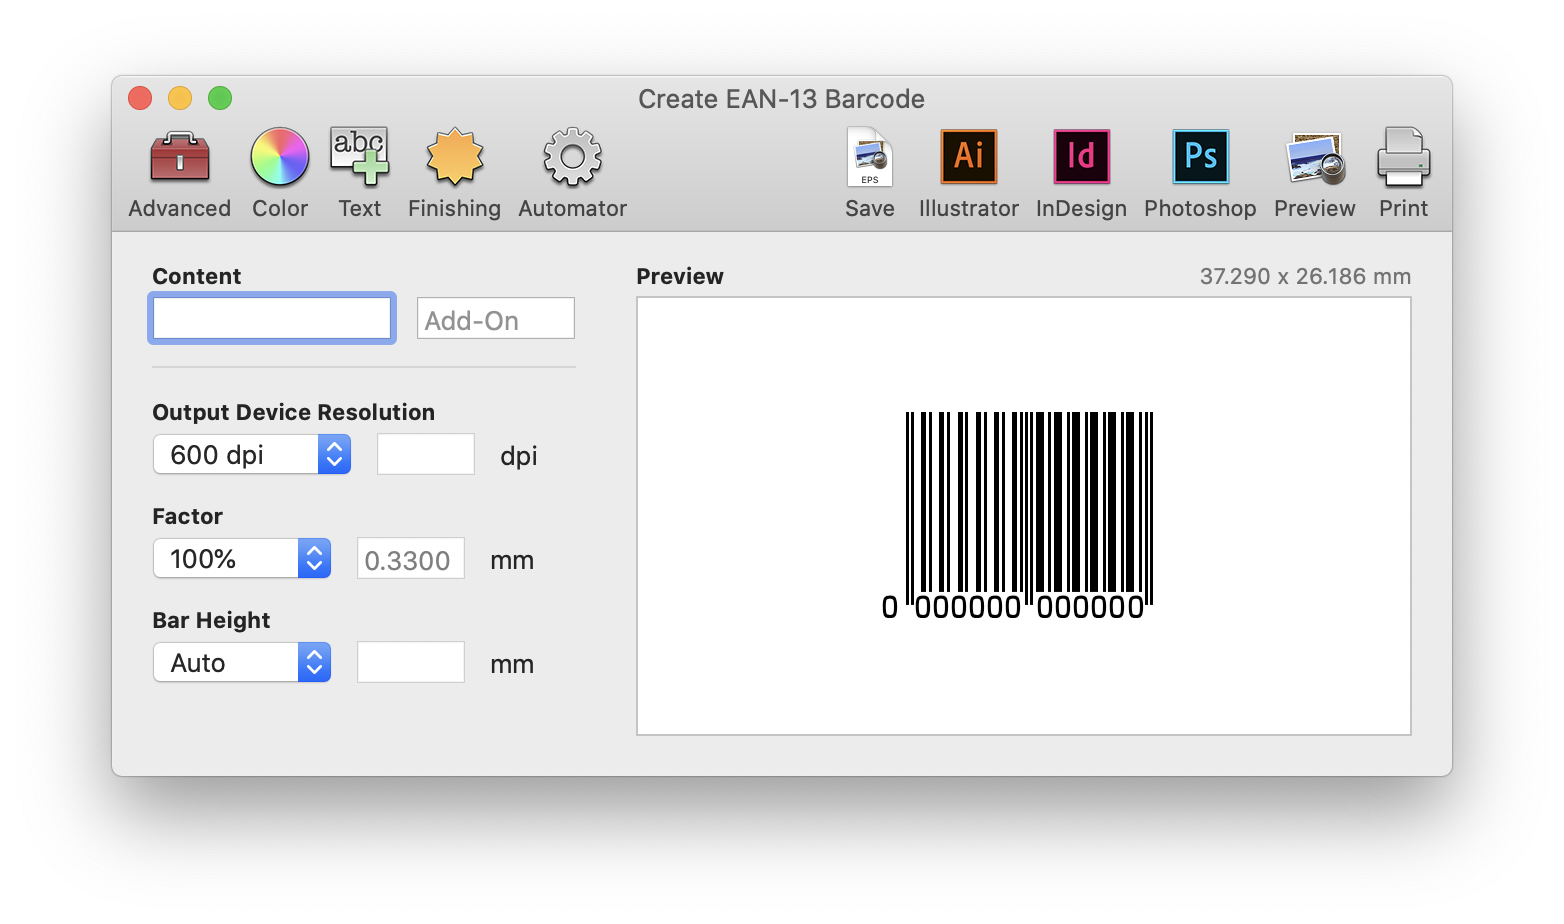
The Content field contains the actual barcode value. Once you start typing, you will notice that Barcode Producer automatically changes the last number of your code. That is the automatically calculated check digit. An EAN-13 barcode needs exactly 13 digits, so Barcode Producer stops accepting input after the 13th digit. The Add-On field accepts an additional 2 or 5 digits — entering anything else will cause Barcode Producer to ignore your input.
The Output Device Resolution field lets you set your printing resolution for output to TIFF.
The Factor field designates the narrowest bar width versus the size of the barcode. If you need to adjust the size of your barcode for whatever reason, you can select a different Factor, anywhere from 80% to 200%, and Barcode Producer will automatically resize the barcode and its bar widths while still maintaining optimum readability by a scanner. We strongly discourage resizing your barcode outside of Barcode Producer.

Changing the Factor field will automatically resize the barcode in the Preview panel in real-time. The Preview panel will also show you the printed size of the barcode in mm.
Finally, the Bar Height field is set to Auto by default, but you can customize it by filling in a height yourself. Barcode Producer will only allow you to enter values that a scanner can read. The Preview panel will show the printed height of the barcode in mm, together with a preview that’s updated in real time.